Bone inlayed furniture is really popular right now…not with people like us, cause we’re cheap, but with people that have money to throw around.
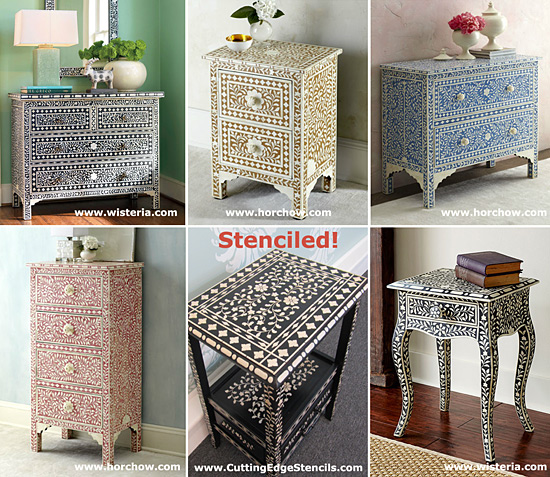
The first dresser (the little black one) has a price tag of….hold onto your britches….$2,999! Holy cajoles…most of the cars we’ve owned have cost less than that. Do people really pay that much for furniture? I’m sure some do or else these companies wouldn’t be in business…I’m also sure that those people wouldn’t be caught dead reading my blog.
So designer Kim Myles came up with a solution for us penny pinching (hundy pinching?) DIY kinda gals…in the form of a stencil, of course. It’s called the Indian Inlay kit and is made by Cutting Edge Stencils.
![KimMylesStencils_IndianInlay_Table[1] Kim Myles Indian Inlay Stencil](http://www.domesticimperfection.com/wp-content/uploads/2012/07/KimMylesStencils_IndianInlay_Table1-650x521.jpg)
I wanted to give this stencil a go, but first I had to find an old table. I see old tables everywhere…that is until I started looking for one. I looked for about two weeks, and then my sister-in law Jaime offered to bring me her table to play with. Perfect! Here it is…

I know, it’s pretty much the exact same as my old table that I did the paisley stencil on…I think everyone in America has owned this table at some point. It’s like an unspoken right of passage.
So, first things first…

I did a few things different on this table than I did on the paisley one (if you haven’t read that post you should, I’m going to reference it a lot). On the paisley table I sanded, then stenciled, then stained. I didn’t want this table to have a rustic look though (I wanted it to be brighter and whiter), which meant I had the stain BEFORE I stenciled. Let me just say this…it was much more forgiving to stencil on bare wood. If you mess up, you can just lightly sand off your mistake, where as if you mess up on a stained table then you just have to live with it. Kim painted her table first and that would by far be the easiest way because you can do unlimited touch ups. I like some wood on my furniture though, so painting it wasn’t going to happen.
Anyway, I stained mine and did two coats of English Chestnut by Minwax. Then I had to figure out how this stencil works.

Other stencils I have used come as one big easy sheet…this one came in a bunch of little pieces. I would be lying if I said I wasn’t a little intimidated looking at all those little stencil pieces and my big, blank, already stained table. It comes with three “border” pieces, one “interior floral” piece, and one small “filler” piece. I was already being non traditional by doing this on wood rather than a solid colored surface, so I made it official and used the “interior floral” piece first. Also, instead if having mine look like bone I wanted it to look like pearl inlays. Capiz inlays? Whatever kind is shiny…that’s the look I was going for. My hubby stopped by Hobby Lobby (I know, he’s awesome) and found this…you just add it to normal paint and it gives it a pearl effect.

So, I got to stenciling. I would usually use a foam roller for this, but the roller was wider than the stencil so I had to use a flat ended brush (same one as on my sign and mat).
If you have never stenciled before then I wouldn’t recommend starting with this one. Remember when I said that the paisley stencil was super easy and took ten minutes to do the whole tabletop? This one took me at least six hours. Granted it has a much more custom look…you can fit the design to the exact shape and size of whatever you want to stencil. Just giving you a heads up that you won’t finish this in one naptime unless your kids sleep for six hours straight. And if that’s the case then I propose a trade…
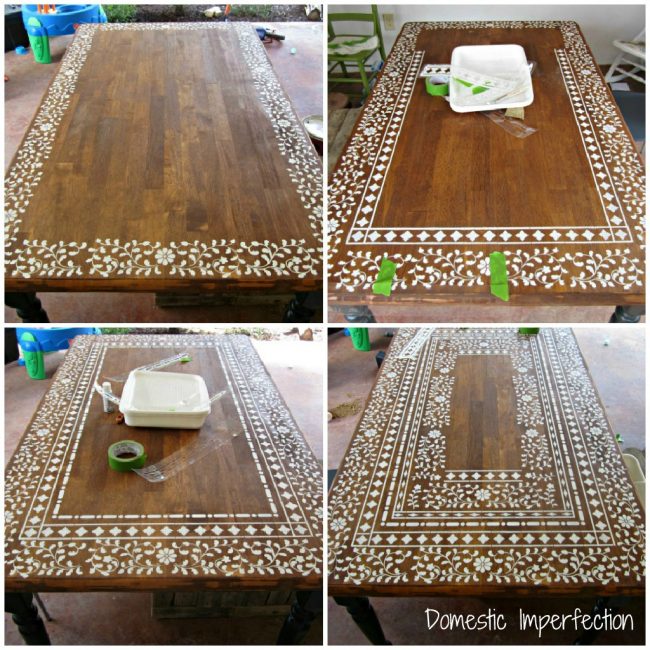
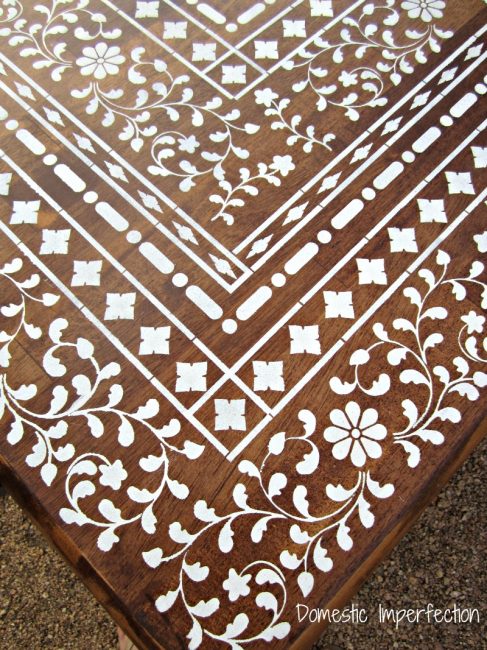
While stenciling I was having a hard time with the corners. I wanted them to look sharp and purposeful, but that wasn’t easy. As I was looking at Kim’s table I noticed something…
![KimMylesStencils_IndianInlay_Table[1]E](http://www.domesticimperfection.com/wp-content/uploads/2012/07/KimMylesStencils_IndianInlay_Table1E1-650x521.jpg)
Some of her corners were less than awesome. Phew! If the designer of the stencil can have corners that don’t match up than mine certainly don’t have to be perfect. Here is the method that worked best for me…

1. Bring your stencils almost together, making sure the vertical lines aren’t longer than the horizontal ones. 2. Cover areas that you don’t want stenciled with tape, other stencils…whatever you have lying around 3. Stencil 4. Pull everything up and admire your (crisp, albeit not perfect but good enough) corner.
When the top was all stenciled (whew!) I applied three thick coats of polycrylic and moved onto painting the chairs. I rummaged through my paint closet and chose the leftover paint from our cabinets…Harbor Grey from Sherwin Williams.
Now, if you are a two year old boy you will really want to help at this point. Here is how two year old chair help goes down… 1. Lightly sand the chairs 2. Throw a tantrum when you are done 3. Clean up all the dust with a damp towel 4. Get striped down and banished to your high chair when it comes time to paint.

Here is the final product!
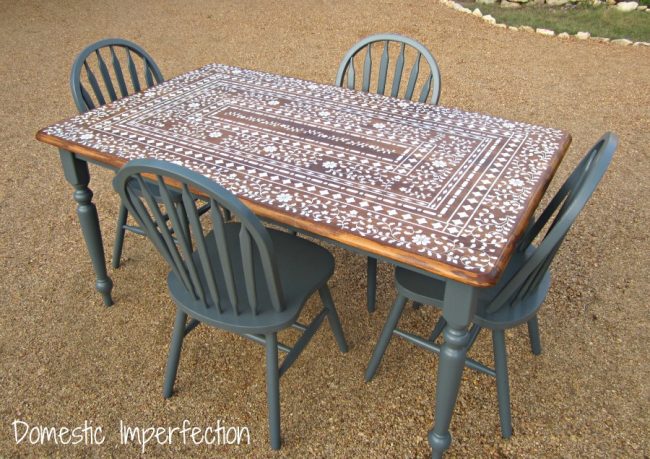
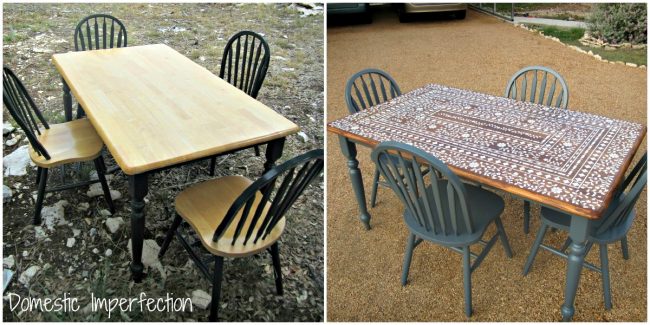
Beautiful, huh? Hard to believe its the same table!
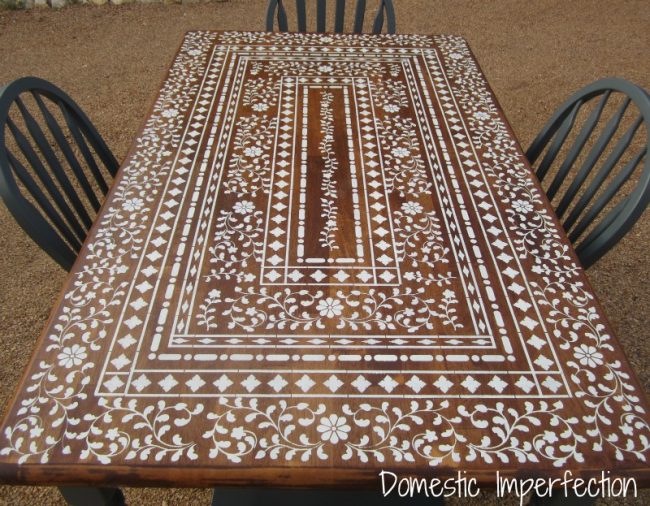
It doesn’t have the shimmer I was hoping for… I was too stingy with the pearlizer because I was afraid of running out. Live and learn! It does have a hint if shimmer though, not that you call tell from the pictures.
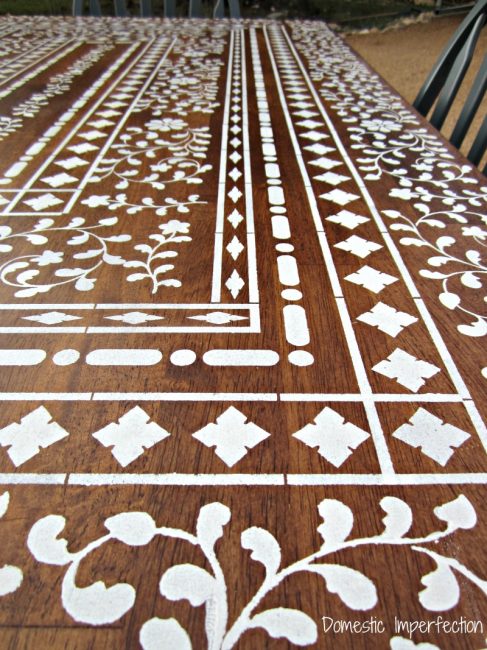


It’s certainly not perfect, there are two areas that are blurry. This is where stenciling on a painted surface would have come in handy…

Not to worry, the mistakes disappear when you step back a couple feet. I’m still allowed to be proud of my corners though!
Here’s a side by side before and after, because everybody loves those.
If you are dying to try out a stencil then I have good news! Just like with my last big stencil project I will be holding a giveaway, and one lucky reader will win $50 worth of stencils fromCutting Edge Stencils! It doesn’t have to be this one either, you can pick any stencil your heart desires. Check back in a couple days :)


No comments:
Post a Comment