Translate

Saturday, May 31, 2008

Turn Your Kitchen Renovation Into a DIY Project

You only want what is best for your home, and the most important area in the house is probably your kitchen. This is the case for most homeowners. It is the favorite, most used area where families and friends gather to socialize and eat. Of course, since you only want what is best in your house, you want to fill it with the most comfortable, best looking interior. If the budget allows, you would also prefer state of the art appliances available to you.

But, if you are looking to remodel your kitchen on a tight budget, there are so many ways in which you might upgrade the look and convenience of it. Many home stores exist that provide corporate help to you if you are thinking about how best to change the look of your kitchen for less.

DIY: On Your Own

One of the greatest ways to save cash when you are thinking of how to remodel your kitchen is to do it all by yourself with the help of dutiful family members and willing friends who you know would be willing to help you through the process. Doing the entire job, even the unpleasant tasks, will not only provide you a new look in your kitchen but will also give you plenty of time to bond with those you care about.

When you think of how you can update the look of your kitchen without much money, what you should do first is take the time to write down all the improvements you have in mind for your new kitchen. Think about what you would like to see in it when a project is finished. In doing this, you can then decide what appliances would best complement the updated look of your new space. Also, you should then decide if you want to replace your old cabinetry or simply renovate your existing cabinets with a fresh coat of paint. You could freshen things up with a new color that could make the room more inviting.

Another thing to consider in kitchen renovation is that plumbing costs a lot of money to replace. If you go with a design that allows you to keep your old plumbing as it exists, you will not have to hire a professional. By cutting costs here, you will not only save money on materials and labor: you will save a lot of time, hassle and effort that comes with tearing up your home.

Finally, make full use of your neighborhood Lowe's or Home Depot. These stores are there to help you and give you ideas as to what would be best as you are trying to figure out how to budget your time, money and materials. For some helpful information, and to get you started with a list of the materials you will need for your project, go to their websites: www.lowes.com and at www.homedepot.com.

Ken Morris usually publishes papers on information associated with granite countertop installation. Working on his documents on how to install granite countertop the writer established his skill on the subject.

How To Build A Safe Playground?

Kids love their fun and break periods. In fact, most kids look forward to their playtime and are very happy and excited when the bell for playtime goes off. Most of the time, these kids spend a lot of their time in playground which is where they often get to have fun. These periods are usually spent in the general local and neighborhood playground, school and other playground et.c.

With time however, things have changed drastically as parents now realize that it is possible to build a playground - even though small - at the back of their homes. While it does cost a bit more then your average toy the rewards in terms of safety and monitoring are phenomenal. Even though building a safe playground at the back of your house costs a lot, it doesn't necessarily mean that the playground equipments are safe for the kids.

Therefore spending lots of money on buying very expensive playground equipments is not a guarantee of the child's safety when he or she is using it. In fact statistics show that over two hundred thousand accidents resulting from injuries and wounds sustained in the playgrounds are treated annually. This rounds up to over five hundred occurring on a daily basis. Injuries that can be sustained from using the playground equipments include joint dislocations, bone fractures, concussions occurring as a result of the head hitting the ground and a host of others.

With all that said, what are the necessary things you need to do to ensure that you minimize - to the lowest possible level - the incidences of injuries sustained from using the playground equipments? The answer to that is by fixing the root cause.

How? Build a safe playground for the kids to use.

So, how do you build a safe playground? What are the factors to be considered when building a safe playground?

First, ensure that the flooring on the playground makes for reducing the effects of a fall rather than worsening it. This can be done by building the floor using woodchips. Avoid the use of hard surfaces such as grass, sand, and asphalt as they will exacerbate the effects of a fall. There are better surfaces such as rubber mulch.

Second, always make allowance for more space. Therefore, the floor should extend to over six feet beyond the play area. If the fort is above 4ft, it would be a good idea to not leave the guard rails open. Keep them close together to disallow the kids from getting their head stuck in between them. For kids that are of school age, make sure that the railings are above thirty eight inches (38in) and finally make sure that you have enough space that can grow as your child grows.

For more information visit All About Playgrounds backyard playgrounds. You can also request more information to find out how to build a safe backyard playgrounds for your kids at playgrounds

Friday, May 30, 2008

Watergarden Liners

by Garth Epp

A pond is typically as good as its liner, because without the liner you would have no pond. There are really two basic styles of garden pond liners; preformed pond liners and flexible pond liners. It is important to choose the style that fits your needs and application.

Preformed pond liners are just that. They are a solid construction that comes in pre-built shapes. Essentially these preformed units are like bath tubs dug into the ground. Some of the more ridged preformed pond liners can also be used for semi raised ponds. These units are relatively easy to install, however it is important to level the unit and properly tap the back fill for a secure fit. A performed pond liner might crack or buckle if it is not a tight fit in the ground.
Flexible pond liners are the most popular garden pond liners. They come in sheets and need to be installed on top of a good underlay. Because it protects the liner from underneath it is important to use a good underlay and not cut corners by using old carpet or newspaper. PVC pond liners are very popular flexible liners and typically are a thickness of 15 mm to 32mm. The thicker the liner the less likely it will puncture. A better option is an EPDM pond liner or BUTYL pond liner. These flexible liners are more pliable (even in cold weather), are easier to mold without creating folds or creases and have a higher UV resistance.
Make sure that the liner you choose is appropriate for your application and is installed correctly. You will want to make sure your liner will not leak once the pond is operational, however if a liner does begin to leak it usually can be repaired, but it is a lot of work and a real hassle. Many pond liners will provide a guarantee of protection, however they must be installed correctly with care.

To choose the right liner for your project, look for the best combination of features for your project. Make sure you do a little comparison shopping between products and choose the best liner for your project. http://www.doityourself.com/stry/water-garden-liner
Through Garth's facilitation of bringing the soothing effects of moving waters indoors, http://www.premium-indoor-fountains.com/ was created.

Thursday, May 29, 2008

Inspiration for DIY Interior Design (Video)

Interior and Exterior Design is one way to help you fall in love with your own home again. (And yes, you can do it yourself.) Many people live in one house for years, and can't see all the potential in your own space that is offered through change by rearranging, reorganizing and purging your stuff. The crazy housing market of late, makes it that much more important to take another look at your home and consider remaking the space rather than selling up to a larger home. Here then is some design inspiration for your home.

Monday, May 26, 2008

Drywall Tools - Drywall Texturing Tools

Big Daddy's hand held drywall texturing tool is a must for any contractor or do it yourself enthusiasts looking for that unique drywall tool to provide dozens of patterns to offer builders and home owners. The drywall texture tools can be used as a drywall tool, concrete tool, or stucco tool to create a variety of patterns quickly and easily. Drywall texturing tools fit perfectly into a 5 gallon bucket to load with material, and can be used as a hand applicator or with an extension pole.

Barbara K DIY Seminar at J&R

Need to fix up your bathroom? Barabara K stopped by J&R to show you the easiest way to do minor fixes yourself, instead of having to call in an expensive plumber.To see Barbara K's line of tools, see: http://www.jr.com/JRSectionView.proce...

GRANITE TEMPLATE FOLLOW-UP

BOB SCHMIDT SHOWS YOU HOW THE FINAL PRODUCT IS AFFECTED BY THE DECISION MAKING WHILE MAKING GRANITE TEMPLATES

Sewer Back-Up Protection

Bob Schmidt shows you how to protect a basement floor drain from potential sewer back-up during flood water conditions.


Bar Fitting With Plywood

by James Holdinski

Plywood as you've probably learnt by now is a tricky material to work with. This is due to the grain running in every direction, this over course makes it prone to splintering along the edges. Not to fear, there are ways to avoid all the downsides of plywood however. Yet still keep all of its good attributes, such as improved strength and durability, not to mention the price, and how readily available it is.

Planing Plywood.

When you plane the ends of a ply wood sheet it will have tendency to fray a little and eventually splinter. One of the easiest ways to improve your planning is have a sharp blade that is correctly adjusted. Many DIY shops will sharpen and set planes.

Fix the plywood firmly. It is best if you have a workbench with a vice, but if not, clamp it to a sturdy table. Set the boards together side by side, so that you can plane several at the same time and keep them level.

To remove material quickly, set the blade to project about 1mm using the adjusting knob. If you find that the blade judders and digs in, reduce the projec-tion a little or try planing in the opposite direction. As you near the final line retract the blade for a finer finishing cut.

Reduce splintering by planing at an angle across the boards. Work in from each side alter¬nately and then finish with a fine cut along the line of the boards.

Sawing Plywood.

Some suppliers will cut the sheet for a small fee if you give them a cutting plan. Otherwise cut it yourself with a hand saw or a power saw, although it may be hard work by hand. I would personally recommend using a circular saw as these generally give straighter lines, however it is possible to use a jigsaw, you just have to take your time and be careful.

Use a soft pencil and a metal rule to transfer your plans and measurements onto the plywood. Identify each part with its key letter. With the sheet marked out, clear a space for cutting. You need quite a large area, so it may be best to work outside. You will also need firm and stable surfaces to support the sheet as you cut it. Long sturdy battens that rest on chairs or workbenches are best -- they will support both sides of the cutting line at once.

Try to saw as accurately as possible, cutting directly through the marked lines of your plan. Any minor roughness can be filled and smoothed down prior to painting, with either a belt sander or, glass paper.

You can fix the pieces together directly after sawing, but you will get a better fit and a smoother finish if you plane the edges first (see above).

A few months ago I was working on fitting a bar for a friend of mine in his Hotel in Blackpool. Using the techniques I've talk about above, it looks like a profession team of bar fitters put the place together.

Remember People Measure Twice Cut Once

http://www.goarticles.com/cgi-bin/showa.cgi?C=934858

James Holdinski is a Scheppach expert, who has been in the trade for 25 years. James fitted a Bar in Blackpool and a Caravan Storage site.

Saturday, May 24, 2008

DIY Home Remodeling: Door trim

Learn easy diy tips for measuring and cutting your wooden door trim in this video of one in a series at Expertvillage.com. See thousands of more videos at http://video.expertvillage.com

http://youtube.com/watch?v=L7N7zOVu1CE

Miter Saws Easy to Use for DIY Project by Robert Carlton

You will want to have a miter saw when you are working with things like baseboards and trim work. They will not only help you cut on a straight angle, but it will also help you to cut on a horizontal angel too. Most will even do beveled edges. You will find that the miter saw quality that you purchase will depend on your budget. You will find that there are many additional features with the higher priced saws. Sliding saws will allow you to more the blade forward so that you can cut the larger pieces.
With compound miter saws you will be able to get the same things like a straight cut, horizontal angle, but they also have tilt motors. Meaning, they can cut bevels. Most of the typical miter saws that you will see on the market do not have the title and are unable to cut the bevels in the wood. You will find that the miter saw will sit on a table while the saw blade spins and is push down through the wood. These types of saws are very durable. Some are light weight and all are portable. You will find that this is because they need to be carried from job to job.
Dual power compound saws may even be known as double bevel saws. This is because they can cut straight and horizontally, but they are able to be tilted in either direction. This is why they are better for beveled edges. You will find that this type of equipment can be very expensive, but it is way better than the typical compound saw.
Sliding compound saws are great, but they work in a way that the compound saw works. There is just one difference that makes the sliding compound saw a little better. That is they can be pulled forward as the wood is cut and you will be able to cut larger pieces of wood because of that added feature.
Out of all the compound saws, it is the dual compound sliding saw that is among the best. These can be used for the typical cuts, but they are able to be tilted in either direction. They also are able to more forward as the wood is cut. They can be moved from site to site with ease and it can give you a professional look for work or home projects.
There are other things like radial arm and miter saws that you can use for work or play. You will find that they can do a variety of cutes, even crosscutting. You will want to keep in mind that some of these power tools can be very expensive, but you have to decide what it is that you need to get the job down, and what features you can afford to invest in.

Being very passionate about miter saw stand review and miter saw benches, Robert Carlton is authoring numerous online reports on the topic. You can find his articles on miter saw reviews at http://www.insidewoodworking.com and various other sources for miter saw reviews information. http://www.goarticles.com/cgi-bin/showa.cgi?C=932141

Thursday, May 22, 2008

Install That Entry Door Yourself

Five Steps to a Brand New Door

Door replacement is a task that any homeowner can complete, with basic skills, a few tools and patience. In fact, this can be a wonderful opportunity for the do-it-yourself person to learn a new task and save a bit of money that might otherwise be paid to a professional. The choice of a the correct door design and finish can change the look of a room, attract the visitor to the outside of the home, and also help keep the home airtight.

For basic understanding of this task, there are three types of doors: combination doors (screen/storm); entry doors; and interior doors. Five simple steps can lead the individual through the task of replacing an entry door. As most experienced homeowners know, mastering entry door replacement gives the individual the knowledge to replace interior doors (a simpler version of the entry-door technique).

Replacing a combination door follows the same steps as that for entry doors, but the process can be a bit more complex. Manufacturers generally provide good instructions and suggestions for installing combination storm/screen doors. Following these instructions carefully will usually lead to completion of the project with success (and reduced stress). Professionals at the home improvement center or hardware store can also be an excellent source for tips and suggestions.

But where should the do-it-yourself homeowner begin with installing doors? Here are five basic steps for the process, starting with:

Remove The Old Door

Careful removal of the old door is an important first step. After opening the door, place a wedge under the outer corner to take the weight off the door hinges. Remove the hinge pins and set the door aside. This door can be used as a pattern for trimming the new door if it has not been seriously damaged or if it isn't too badly warped.

Remove Hinge Leaves

The next step is to remove the hinge pieces from the frame. Depending on the desire to use existing hardware, these hinges can be reused or new ones can be substituted. Older hinges can be lightly buffed with fine sandpaper to restore some of the original appearance. Be sure the screws for the new hinges are long enough to reach into the stud behind the door frame.

Trim New Door

It would be wise to use the old door as a pattern for the new one. The alternative is to measure the door opening and allow a 1/8" bottom clearance as well as a 1/16" top and side clearance. The bottom clearance for a carpeted floor will probably have to be 3/4". Trim and plane door as necessary, using a fine-tooth saw and good plane.

Prepare New Door For Hinges

New areas must be carved out so the hinge blades can fit smoothly into the frame and door. Using the old door can help with proper location of hinges. A pencil outline of the hinge is essential for cutting this depression in the wood. Carefully chisel out the wood, with several cuts to the depth of the hinge leaf.

Hang New Door

It is time to put the hinges on, securing them with strong screws. When hanging the door, insert hinge pins by starting with top hinge. With patience and attention to detail, this project can be finished quickly enough to allow time for a bit of relaxation!

The author Jack Blacksmith is especially interested in issues associated to saw patterns. Sharing his passion in documents, the writer showed his skill on news about free scroll saw pattern and saw patterns.

DIY - Upgrade Your Old Deck

Is your deck looking like it is past its prime? Does it even have the odd softer spot here and there? Is it faded and looks more the color of gray concrete than of red cedar? If you have already priced out the cost of a replacement and decided that you haven't got a spare $8,000 at the moment - think whether or not you have a spare weekend or two. If you 'con' the family or friends to join in and help, it may even be a fun and memorable weekend.

The number of tools you will need is minimal and they can be rented. Apart from the usual household tools, you will need a small saw to remove and replace the small damaged sections of deck boards (and some two-by-fours for replacement boards if you need them), an electric sprayer to apply the cleaners, etc, a (long handled) painting pad and a stiff deck broom to use as a scrubbing brush. Some people recommend a power washer, but if you do use one, be careful with the pressure. Some of the pressure washers are so fierce that they can actually force dents into your woodwork!

A normal household water pressure when applied through a garden hose is around 60 to 80 pounds per square inch pressure, and you can buy pressure washers that can multiply this by about 15 times and zoom it up to 1,000 pounds per square inch. Ouch!

If you use a fierce power washer you will have to keep the wand a good eighteen inches away from the deck surface and also do not let it remain stationary on any one area, i.e., keep it moving. However, before you get to that part, check your deck for loose nails, twisted boards, softer areas that must be cut out and replaced, etc.

If you have nails popping up, you can hammer them below the surface using a drift punch, or lever them out and replace with screws or a slightly larger nail. If some of your planks are twisted, they will need to be screwed down while someone stands on them! If this is not working, the boards will have to be replaced.

Once you have your deck ready to work on, the first thing to do is to apply 'deck wash'. Wet your deck down and apply the wash directly onto the deck; spray on only the amount that you can scrub in in about a ten minute period. Use your broom to scrub in the wash and also to distribute it evenly.

After leaving the wash for about fifteen minutes, you can hose or power wash it off. You will be amazed at the difference that just a wash can make to your deck. If some spots still remain dull or dark, they may be helped by the wood brightener.

The procedure for the brightener is similar. Wet the deck down, spray on the brightener BUT this time wait a few minutes, scrub it into the surface and after about ten minutes you can rinse it off. Work on a strip about ten boards wide.

Once this is done you must wait a few days to let it thoroughly dry out. If it has not rained for a couple of days, then you can seal it on the second weekend.

After all the hard work, you can now apply the part that really makes a difference: the sealer/stain which will waterproof your deck. Whichever finish you choose, remember to paint the railings first; use a three inch brush for this and work down from the top, to catch the drips!

If you've had to add many new pieces of wood in your deck, and you wish to keep it looking uniform, then you may wish to paint it. Use proper deck paint and get the best one that you can afford. Some manufacturers recommend two coats of primer and one of top coat, whereas others recommend two of top coat and one of primer! A quick drying self priming alkyd paint is ideal if you want less work.

If you are going to stain it, notice that there is a heavy stain and a light stain. This refers to the way that it looks on your wood, not to the durability. A heavy bodied stain will show up the grain but not the texture, whereas lighter bodied will still show the texture as well as the grain. If you feel that your wood is somewhat 'weathered' and overly textured, you may wish to choose the heavier stain to smooth it out a little. If your stain is not a stain/sealer, you can coat the stain with a sealer once it is dry; use one that says it is 'non chalking' to avoid your finish being rubbed off with wear.

Apply the deck stain with a painting pad (like a long broom handle with a flat board on the end of it.) A painting pad has a slightly rough finish so that it will rub the liquid into the surface of the wood. Apply your sealing coat along the grain of the wood.

Wait 24 hours, pull out your sun chairs, stretch out and congratulate yourself; you have just saved thousands of dollars!

If you're looking to relocate to Alberta, be sure to check out Justin Havre's Calgary Real Estate Site. Visit JustinHavre.com today for the latest information on the Calgary real estate market

Repairing Damaged Vinyl Siding

Even though vinyl siding is pretty resilient it does sometimes break, crack, or fall off do to wind. Well then how do we replace the broken piece? It's pretty easy and with about an hour you can have a new piece up to fix the broken one, or have that one piece that fell of due to wind damage back up.

Well first off we will talk about the new siding that we have to purchase, if you have some extra laying around, great you can use that, but if you don't then you need to go to the store and find the same color siding that you have on your house.

Depending on how long the siding has been up on your house and the color of it, you might notice that the sun has faded it a bit. Well here are a couple things that you can do. find a piece that isn't very noticeable and put the new piece there and used that piece to fix the damaged part. If you don't care then you can just replace that piece with the new piece.

We are going to need a tool called a zip tool. you can get them at siding distribution stores or your large home improvement store. You are going to use this tool to remove the siding from one another and the when the new siding is on you use it to put it back together.

Rather then explaining the whole process and having you be completely confused, I came a cross a video that does a great job explaining how to use the zip tool, and also shows you the proper way of removing the vinyl siding and replacing it. click here to watch the video.

For more articles like this visit http://www.pshomehelp.com/

Wednesday, May 21, 2008

How to Build a Small Brick Barbecue

How to Build a Small Brick Barbecue

Concrete Base:

"Ready-mix" concrete may be used, or the concrete is to be mixed on the site. If the concrete is to be mixed at the site, a recommended mix is 1 part portland cement, 2 parts clean dry sand and 2 1/2 parts gravel or crushed stone, by volume.

First, dig the footings and construct the forms for the base. If the holes are dug accurately to the required depth of 24 inches, forms may not be necessary, for the earth will provide its own form. If the surface of the base is to be above the existing ground level, it will be necessary to build a wood form in the shape of the base. In either case, the surface of the concrete should be finished flat and level.

The concrete may be mixed in a wheelbarrow with a garden hoe. Ingredients should be thoroughly blended, as directed above, before adding water. No more than six gallons of water per bag of cement should be used. In estimating, it can be assumed that the yield of the concrete will be approximately equal to the quantity of gravel used. The concrete should begin to set within one half hour and should be covered with burlap or plastic for the first 48 hours.

Bricklaying:

Bricklaying tools include a hammer, mason's string, a few 10d nails, a trowel, a spirit level, a hand level, a piece of carpenters chalk and a broad-bladed cold chisel. The chisel, called a brick set, is used for cutting brick. A tap on the chisel with the hammer will score the brick along the line of the cut. This is done on two surfaces of the brick. Then, pointing the chisel inward, strike a sharp blow with the hammer, a clean break should result.

Brick should not be laid bone dry. They should be damp, but not wet. A thorough spraying with a hose 15 minutes before using will usually suffice.

Before using any mortar, use 1 part Portland cement, 1/4 part hydrated lime, and 3 parts fine, clean sand by volume. Add enough water to get the consistency of soft mud. It's about right when it slides from the shovel easily, but does not run. Mix small batches - by the shovelful, not the bagful (i.e. 1 shovelful of cement, 1/4 shovelful lime, 3 shovels full sand). No more mortar should be mixed than can be used up in 2 hours. Should the mortar lose is plasticity before being used, temper it by remixing with a little fresh water.

Build the corners first, going three or four courses high, then filling in the wall from corner to corner. Be sure to lay the bottom course on mortar to bond it to the slab. Frequent use of a hand level will help keep the wall plumb and the courses level. Make all mortar joints even at 1/2 inch.

Excess mortar can be clipped off every 2 or 3 courses with the trowel. Tooling is done at the same time to seal the joints. For tooling, a short length of pipe, slightly larger in diameter than the thickness of the joints, can be used, working first vertically then horizontally to achieve a concave joint.

  • Note: A secret of good brickwork is not to move a brick once it is in place, consequently, care in placing the brick in mortar pays off.

Spread a bed (horizontal) joint first to the proper thickness for not more than three bricks at a time. Roughen the surface of the mortar by making a shallow furrow with the point of the trowel. The head (vertical) joint is applied by spreading one end of the brick with mortar. Make sure that all joints are completely filled with mortar - to insure a watertight barbecue.

Courtesy of the Brick Institute of America

http://www.doityourself.com/stry/smallbrickbarbecue

Tips for Preserving Wooden Staircase

Tips for Preserving Wooden Staircase
By Bill & Kevin Burnett

Q: I would like some advice about what to do about the wood steps of our Victorian home. We have had to paint them every year, even after having them professionally prepped and painted. The paint chips and the caulking cracks.

Should we replace them with brick or stone? Or is there something we can do when painting them so that the job lasts?

Whenever I see steps with no chipped paint, I suspect they have just recently been painted. Are we the only ones with this problem? Am I being too fussy? We live in the Western Addition area of San Francisco, in case that makes a difference, weatherwise.

A: You're not the Lone Ranger; others have this problem. And, you're not being too fussy. The staircase is the first thing a visitor to your home sees. It sets the tone for the rest of the house.

Maintaining wood steps and porches on Victorian homes is an ongoing proposition. But, redoing them every year seems a bit excessive. Every three to five years is a bit more like it.

Victorian preservation holds a special place in our hearts because we've owned and restored them. So, please don't replace the wood stairs with brick or stone. You'll only compromise their original beauty.

Refurbishing the stairs is the way to go. This will maintain the originality of the house and will be less expensive than a brick or stone replacement.

About 12 years ago, Kevin replaced the entrance staircase on his Alameda, Calif., Italianate. It was in such bad shape that painting was no longer an option and a complete rebuild was the only way. But when it was done, it was drop-dead gorgeous.

Whenever he visits the San Francisco Bay Area, Kevin makes it a point to drive by the home. The stairs still look great.

Weather does have an effect on the longevity of a paint job on wood -- especially old wood. Fluctuations in heat and humidity cause wood to expand and contract, which causes the paint to chip and the caulking to crack.

We suspect that your steps are original to the house. If they are, the boards have had a century to dry out. This dryness increases movement of the wood from changes in temperature and humidity.

Keeping wooden steps painted increases the life of the treads and risers. You've done this, but now, because the paint won't hold, more than maintenance alone is needed.

It's time to put on a new face by recycling or replacing the treads and risers. This requires a bit of intermediate-level carpentry. It's a pretty big job but it's well within the realm of a do-it-yourselfer.

Begin by gently removing the stair treads and risers. Start at the top tread. With a small, flat steel bar pry it away from the stringers (the stepped framing of the stairway) enough so that you can get a saw blade under the tread. With a reciprocating saw, cut the nails securing the tread to the framing.

Remove the tread in one piece. Look at the underside of the tread. It will probably be unpainted, and with any luck it will be intact and in good condition. If so, the underside of the treads and risers can become the new topside and will save you a pretty penny.

Work your way down the staircase, removing treads and risers in turn as you go. Be sure to number each one so you can replace it in the same spot. Mark an end of each board with an indelible marker, because ink will bleed through the primer.

Sometimes the boards are too brittle to remove in one piece. If that's the case, there's no need to be concerned about removing them intact, so tear them out. You'll be replacing those with new material anyway.

This is a good time to inspect the stair framing and replace any fungus-infested or damaged sections. Also apply a heavy coat of wood preservative (such as copper naphthenate) to the framing to retard fungus and insect infestation.

The most important step in replacing wooden stairs is to seal them. A good paint job will increase the life of the new staircase by many years.

It's critical to prime all six sides of each board with two coats of oil-base primer. Oil penetrates the wood, locking out moisture and reducing expansion and contraction due to weather. This is especially important if you are recycling the old treads and risers because old wood has a lower moisture content than new material. It's easiest to prime the boards before installing them.

Once the boards are dry, install the treads and risers. Start at the bottom of the staircase. Glue each tread with construction adhesive and then nail it to the stair frame. Also apply a bead of caulk to each joint as you go along.

Once the installation is complete, apply two coats of finish porch and deck paint. We've always had good luck with epoxy porch and deck paint. It's tough, long lasting and it's not as slick as enamel.

Copyright 2006 Bill & Kevin Burnett. Distributed by Inman News. http://www.doityourself.com/stry/victorianstaircase

How to Build Outdoor Stairs

Building a stairway can be one of the most intimidating tasks any builder – amateur or professional – tackles. But an outdoor stairway is generally not a difficult project, as long as it is planned and executed carefully. This document covers building procedures for a straight-run utility stairway, typically used on porches and decks.

Local building codes regulate the width and slope of a staircase, as well as how the assembly is supported and braced, how the landing is built and whether railings are required. ALWAYS CHECK WITH YOUR LOCAL BUILDING DEPARTMENT BEFORE DESIGNING A STAIRWAY, AND FOLLOW ALL LOCAL CODES.

The following instructions are intended as general guidelines only, and local requirements should be your primary guide.

In this document you will find information about:

  • Stair-Building Terms
  • Designing Your Stairs
  • Building Your Stairs


STAIR-BUILDING TERMS
  • There are five basic design elements you'll need to consider when planning outdoor stairs:

  • The Total Run is the total horizontal distance covered by the staircase, from the edge of the upper floor (porch or deck) to the edge of the staircase where it rests on the landing.

  • The Total Rise is the total vertical distance from the surface of the landing to a point level with the surface of the upper floor (Note: You can't find the rise simply by measuring straight down from the upper floor because the ground directly below may not be level with the landing).

  • Run is the horizontal distance from the leading edge of one tread to the leading edge of the next tread.

  • Rise is the vertical distance from the surface of one tread to the surface of the next tread.

  • Passage Width is the width of the stairway.

  • The ratio of the total rise to total run (or rise to run) determines the slope of the stairway. As a rule, that slope should be between 30 degrees and 35 degrees; an outdoor stairway may be slightly shallower but should not be steeper. The ideal riser height is 7" with an 11" run–which also works out well with standard lumber widths–but you may have to vary the proportions somewhat to make the height of each step work out evenly between the landing and the upper floor.

  • The passage width can also vary, depending on how heavily you expect the stairs to be used. As a rule, 36" is the minimum; 48" is better for a single person, and you may want to go to 60" to allow room for two people to pass comfortably.

  • A stairway consists of four basic components:

  • Stringers are the sloped members that support the stairway. 2x10s are generally allowed for stairs with four treads or fewer, but 2x12s are sturdier.

  • In most cases, you'll need good quality material with no large knots, either pressure treated or cut from heart redwood or cedar, to resist decay. Stringers should be placed no more than 24" apart if the treads will be 5/4 material or 36" apart for 2"-thick lumber.

  • Treads are the horizontal members that you walk on. When building an outdoor stairway, they are typically cut from the same material as the upper floor deck or porch–5/4" pressure-treated pine or 2"-thick lumber.

  • Risers are the vertical members at the back of each tread. 1" surfaced boards (3/4" net thickness) are the most common material used.

  • The Railing Assembly consists of posts, a cap rail and vertical balusters between each post. 4x4 is the most common post material with a 2x4 handrail. Codes regulate the overall height of the railing assembly (usually 30" to 34") and may specify a maximum width for the handrail.
How a stairway is built depends primarily on the total rise–the vertical dimension from the upper floor to the lower floor. The total run–the horizontal length of the stair assembly–depends on the slope of the stairway, which is determined by building codes. From the Sunset book, Basic Carpentry Illustrated, © Sunset Publishing Corporation.
The components of a stairway, with basic stair-building terms. From the Sunset book, Decks, © Sunset Publishing Corporation
The components of a railing. From the Sunset book, Decks, © Sunset Publishing Corporation

DESIGNING YOURS STAIRS
  • To design the stairway, first find the total rise. Divide that number by 7 (the ideal riser height) to find the number of steps. You'll probably have a fractional remainder, so round your result up or down to the nearest whole number.

  • Then divide the total rise by that number to find the exact height of each riser. For example:

    1) Total rise = 40-1/2"

    2) 40-1/2" divided by 7" per riser = 5.78 risers

    3) Round 5.78 up to 6 risers, then 40-1/2" divided by 6 = 6.75" or 6-3/4" per riser

    This document assumes that the total run is not limited, so you can make the assembly as long as you want. Use the following table to determine the width of the treads, depending on your riser height.

    Riser Height
    Run Width
    6"14"
    6-1/4"13-1/2"
    6-1/2"13"
    6-3/4"12-1/2"
    7"12"
    7-1/4"11-1/2"
    7-1/2"11"

  • To find the amount of material needed for risers, simply multiply the number of risers by the passage width. To find the amount of tread material, subtract 1 from the number of risers (you'll need one fewer tread than risers) and multiply by the passage width. Remember to double up if you'll be using two boards for each tread.

  • To find the length of the stringers, you'll need a calculator with a square root function. First, find the total run (number of treads multiplied by the width of each tread).

  • Then find the square of the total run (total run multiplied by itself) and the square of the total rise and add them together.

  • The square root of the result gives you the exact stringer length; round up to the nearest standard lumber length, then multiply by the number of stringers you'll need.
Common tread-to-riser ratios. From the Sunset book, Decks, © Sunset Publishing Corporation.

BUILDING YOUR STAIRS
  • To build the staircase, first notch the stringers for the treads and risers. Fasten two stair gauges to a carpenter's square at the dimensions of the rise and run (for example, at 6-1/2" on one leg and 13" on the other). Set the square on the stringer so the gauges are flush against the edge and trace the notch along the edge of the square.


  • "Step" your way down the stringer, repeating the process until you have laid out the correct number of notches. Use the carpenter's square to lay out the top cut on the stringer. The height of the last riser should be less than the others by an amount equal to the thickness of the tread. That way, when you nail the last tread in place, the step down to the lower floor will be equal to the others.

  • You can set the stringer directly on the lower floor (typically a landing pad) and bolt it in place with a piece of angle iron, or bolt a length of pressure-treated 2x6 to the floor and nail the stringer to it.

  • If you plan to set the stringer on a 2x6, you may have to notch the bottom of the stringer to allow for that piece.

  • Once the stringer is laid out, cut the notches partway only, using a circular saw. Take care not to cut beyond the layout lines. Finish the cuts with a handsaw.

  • Once you have one stringer finished, set it in place to make sure it is cut correctly, then use it as a template to lay out your cuts on the other stringers.

  • You can hang the stringers to the rim joist with joist hangers, or bolt them in place to a joist. If you need to pour a concrete landing pad at the bottom of the stairway, set the stringers in place temporarily and lay out the location of the pad. Pour the pad and set anchor bolts for the angle iron or 2x6 base. Instructions for pouring concrete are in another brochure in this series.

  • Once the landing pad is cured, secure the stringers at the top and bottom. Rip the risers to the same width as the height of the riser cut in the stringers. Then cut them to length and nail them to the stringers with 8d galvanized nails.

  • Measure the distance from the face of the riser to the edge of the notch cut, then rip the treads to width so they extend 1" to 1-1/8" beyond the edge of the notch. If you're using two boards side by side as treads, rip half the dimension from each board so both will be the same width. Cut the treads to length and nail them to the stringer with 16d galvanized nails.

  • To build the railing, first secure 4x4 posts at the top and bottom of the stringer. Notch the posts 1-1/2" deep and bolt them to the sides of the stringers with 1/2x4-1/2 hex bolts, using a level to keep them plumb. Use decay-resistant lumber for the posts. They should be at least long enough to extend 36" above the surface of the treads. Leave them a few inches too long at the top so you can cut them after they are in place.

  • Measure from the bottom of the stringer up the posts to the location of the top and bottom rails. The top surface of the upper rail should be 30" to 34" above the tread; the rail should be about 6" above the tread. Lay the railing material against the posts and lay out angled cuts for any rails that will be fastened between the posts.

  • Cut the railings to length and toenail them with four 8d galvanized nails. If you'll be using balusters, cut them to length and nail them to the rails. Check local codes for spacing requirements on balusters.
Set the carpenter's square on the stringer so the riser and tread dimensions are at the edge, then trace along the square. Move the square to the previous mark and repeat the process. Subtract one tread thickness from the layout at the bottom so the last step is equal in height to the rest. From the Sunset book, Decks, © Sunset Publishing Corporation.

Stringers may be hung from the rim joist with a joist hanger so the first step is flush with the deck surface. In this configuration, a piece of pressure-treated lumber is bolted to the landing pad and the stringer is nailed to it with 16d galvanized nails. From the Sunset book, Decks, © Sunset Publishing Corporation.

The stringer can be bolted to the end of the joist so the first step is one step below the surface of the deck. At the landing pad, the stringer may be fastened to an angle iron (the angle should be galvanized) bolted to the concrete. From the Sunset book, Decks, © Sunset Publishing Corporation.

TOOL AND MATERIAL CHECKLIST

  • 2x10 Stringers
  • 5/4" or 2" Tread Material
  • Angle Iron
  • Hex Bolts
  • 8d Galvanized Nails
  • 2" Railing Material
  • Hammer
  • Measuring Tape
  • Joist Hangers
  • 1x8 Risers
  • 2x6 Pressure-Treated Cleat
  • Anchor Bolts
  • 16d Galvanized Nails
  • 4x4 Posts
  • Baluster Material
  • Carpenter's Square
  • Adjustable Wrench

Check your state and local codes before starting any project. Follow all safety precautions. Information in this document has been furnished by the National Retail Hardware Association (NRHA) and associated contributors. Every effort has been made to ensure accuracy and safety. Neither NRHA, any contributor nor the retailer can be held responsible for damages or injuries resulting from the use of the information in this document.

Ask for Other "Show-How" Instruction Sheets
Additional easy-to-use instruction sheets for home do-it-yourself projects are available from your local supplier of materials. Come in and ask for "Show-How" instructions when you get ready for that next handyman project!


http://www.doityourself.com/stry/h2buildoutdoorstairs

The Garage Design Dilemma

The Garage Design Dilemma
By Katherine Salant
Over the last 100 years, our houses and our lifestyles have continuously evolved, but our aesthetic compass seems firmly fixed. Despite the exhortations of generations of architects to embrace the slick, spare and techno, most people prefer traditional styling and floor plans that have been massaged to incorporate new rooms and an increasingly informal lifestyle.

But car storage continues to be a nettlesome design issue, whether the design is modern or traditional. The connection of the garage to the house is always awkward, invariably funneling owners through a storage or service room before reaching the living space, and the garage has become so big it often overwhelms the rest of the house. Not only do most households today have two cars that they want to put under roof, they also have power mowers, gardening equipment, bicycles and other sporting equipment, recycling bins and garbage cans, and just miscellaneous stuff.

To get in the two cars, plus the garbage cans and recycling bins and maybe a bike or two, the garage must be at least 19 feet wide and more than 400 square feet in area. If you want to be able to open a car door and not hit the other car, and get all the lawn and gardening equipment in too, the garage needs to be 24 feet wide and close to 600 square feet in area. Throw in the large overhead door and the garage has become the architectural equivalent of the 900 pound gorilla that can't be ignored.

Discreetly placing this giant gorilla in the far corner of a large lot is rarely an option. Even when it is, most owners want the convenience of having the garage attached to the house. Attaching the garage on the side of the house is out because with rising land costs, lots are too narrow. The only alternative is attaching the garage at the front of the house where, because of its size, it becomes the main architectural feature. And, given many builders' desire to economize on asphalt paving, it is often as close to the curb as possible.

When many such houses are lined up together, the streetscape is largely garage doors, producing, critics suggest, an atmosphere that is less friendly. To create an environment that is more neighborly, many land planners favor moving the garage to the rear of the house, where it is accessed from a rear alley.

This does improve the look of the street - varied house fronts with many smaller door and window openings are certainly more interesting visually than large flat garage doors - but this has its own set of problems. Adding the alleys raises land development costs and house prices, and moving the garages to the rear doesn't necessarily enhance social interaction among neighbors.

Dallas architect Will Snyder observed that in Dallas, the alleys often become a secondary road system that residents use instead of streets, so much so that in one instance Snyder recalled a friend giving directions to his house through the alleys because he never used the streets and couldn't describe them.

Snyder also said that Dallas neighborhoods with alley and rear garages have been a tempting target of burglars because they can enter the house far less obtrusively from the alleys and then, unobserved, loot a house.

Moving the garage to the rear of the house also puts it squarely in view of the main living spaces, which are now at the rear of the house, another reason that many new home buyers have not embraced this idea.

Not every architect and planner thinks the garage at the front is so bad. Both Gaithersburg, Md., architect Randy Creaser and Santa Barbara architect Barry Birkus agreed that when the garage is on the front of the house, residents see the comings and goings of neighbors and actually feel more connected to the neighborhood. The trick, they both said, is masking the garage to disguise its bulk.

When confronted with lots that are only 35 feet wide - so narrow that a front loading garage is unavoidable - Creaser tries to add a second story above so as to incorporate the garage into the massing of the rest of the house, and to add a strong entry element such as a front porch.

For much larger houses with four-car garages and larger lots, Birkus has provided two attached 2-car garages that open off a separate motor court to one side of the house. The garage that faces the street is recessed at least 20 feet from the front of the house. The other garage is closer to the front lot line, but it has a side load and its street side has windows.

Whether the garage is at the front, back or side, however, the connection between the garage and the rest of the house is invariably awkward. Owners nearly always enter the house by driving into the garage and then going into the main house through a rear service area near the kitchen. The entry foyer, whether modest or voluminous, is rarely used.

Finding the aesthetics of this arrangement distasteful as well as impractical, Creaser adds a "garage foyer" whenever possible. He includes a countertop to drop a briefcase and sort mail, and a closet. If the space is large enough, he designs a row of large cubbies for family members to put backpacks, coats, and sports equipment.

Perhaps one reason that the garage confounds designers is that unlike other rooms that have been added to houses over the last 100 years, it didn't grow out of another function. For example, what we call the family room today is really just a modern version of the back parlor of the Victorian era, an inner sanctum that only family members used. As Bethesda, Md., architect Sami Kirkdil put it, "all the images of old houses we know and love, there is no car."

At the turn of the last century, when the rambling Victorian, colonial and tudor-styled houses that we cherish today were built, car ownership was unusual. The few households who owned one kept it in a separate storage shed behind the house and brought it out only for special occasions, said Birkus, who has studied the history of car storage in American houses in his efforts to find new solutions.

In the following decades, car ownership became more common, but most households still owned only one car. Two-car households and two-car garages become the norm, and gardening and sports burgeoned only in the late 60's and 70's. Today, as buyers press for three and four-car garages, "the car and the garage seem to be possessing the house," Birkus observed.

The perfect garage solution remains elusive. But given the ingenuity of designers and builders to bend historical forms to current functional needs or to design something entirely new, this dilemma will eventually be solved.
Copyright 1999-2006 Katherine Salent. Distributed by Inman News.

http://www.doityourself.com/stry/garagesolutions

Friday, May 16, 2008

Furnace Filter Replacement Guidelines

How often you change your furnace filter will depend on the type of filter you use, and how you operate your furnace. Select the type of filter you use from the list below to find out what you should be doing.

Disposable Filters - Disposable filters should be changed every 6 to 8 weeks. A lot of people try cleaning these filters but they are not really meant to be cleaned and may actually become even less efficient. Disposable filters are not very efficient and provide only a basic amount of air cleaning. If you run your furnace fan continuously, cleaning should be performed every 3 to 4 weeks.

Washable Filters - Washable filters should be cleaned every 6 to 8 weeks for normal use. If you run your furnace fan continuously, wash filters every 3 to 4 weeks. When you wash your filter be sure to inspect it for wear and tear.

Hammock - Hammock filters are not meant to be washed and should be replaced every 8 to 10 weeks. When you purchase a replacement hammock filter it may be a little larger than the metal frame it’s attached to. Install the filter on the frame and then trim off the excess.

Electrostatic Air Cleaner - Electrostatic air cleaners must be cleaned monthly. To clean them first vacuum the nylon media and then rinse the filter with water. Be sure to raise the filter in the opposite direction from the air flow. Electrostatic air cleaners are very difficult to get very clean so as your filter gets older, clean it even more often. When cleaning inspect it for damage and wear and tear.

Electronic Air Cleaner (EAC) - The most important thing to remember about electronic air cleaners is to keep them clean. EACs are very efficient until the cells get dirty and then lose a lot of their efficiency. When cleaning the cells be careful not to break any of the thin wires that run along the outside of the cells. If one of these wires break, the cell current will be broken and will not work. Do not forget to clean the small prescreens as well.

Large Pleated Media Filter - This is the easiest filter to clean. All you have to do is replace the media cartridge semi-annually. Arrange to have your cartridge replaced at the same time as you have your annual heating and cooling maintenance performed.
This article is free for republishing
Source: http://www.articlealley.com/article_538589_27.html

Thursday, May 15, 2008

Do-It-Self Hole Repair

Repairing a hole in your wall is easier than you think and there is usually no need to call a handyman. Even large holes can be a do-it-yourself project. Here are some tips to repairing a hole in your wall.

First off, you need to do some preparation and planning. Make sure you have the right tools for the job including putty knives, sandpaper with both course and fine grit and compound. Larger jobs will require more materials and tools such as drywall, drywall nails or screws and a trowel. Make sure that the area around the patch is clean so the compound will adhere to the wall.

Next, you need to determine the best method for repairing the hole and this depends on the size of the hole. For small holes that are no larger than a dime, e.g. nail and screw holes, all you need to do is patch it with putty (wall compound). Simply apply a little putty, use a scraper or putty knife to make it flush with the surrounding wall, wait for it to dry, and sand it smooth. For holes that are slightly larger, say the size of a switch plate, you'll need to fill the hole with newspaper before applying the putty. When applying the putty make sure that you use a putty knife that is wider than the hole to ensure it becomes flush.

For medium size holes no larger than about 10 inches you need to apply a hot patch. Cut a piece of drywall the approximate size and shape of the hole and apply drywall tape to the edges to create a flap for affixing to the wall. Apply drywall compound to the entire area and make three to four applications until the area is level and smooth.

You'll also need to use drywall to fix anything larger than a medium size hole. It won't be merely a patch; you'll need to basically build a new piece of wall. Cut and remove the damaged drywall from stud to stud. Cut a piece of new drywall that is the same size as the new opening and attach it to the studs using drywall nails or screws. Try to minimize the size of the seams since it is harder to cover up large gaps. Use drywall tape on the seams, apply compound and smooth with a trowel or putty knife. Wait for the compound to dry (about 24 hours), sand and scrape excess compound and then reapply. Repeat this process one or two more times or until the new drywall and seams are flush with the rest of the wall.

A key to making your job look like it was done by a professional is not to over spackle. Don't think that by applying large amounts of compound you won't have to do extra coats. It's necessary to apply small amounts, let it dry and then repeat three or four times.

Clinton Maxwell very often edits papers on information corresponding to drywall finishing tools and how to do drywall taping. With his works, the columnist demonstrated his capability on areas relating with automatic drywall taping tools.

Installing a Sump Pump The Home Improvement Warrior Way - Sump Pit

If you're a weekend home improvement warrior, you may have considered installing your own sump pump. It saves money and besides you learn something new to help hone your home improvement guru skills. There are a few items you will need to start: sump pump/liner, saw, electric drill, work gloves, protective goggles, jackhammer (can be leased) cement and trowel, PVC pipe, PVC cement/bond, and fittings, a level, and caulking gun with caulk.

Put on the protective goggles and work gloves before installing the sump pump. The first order of business is digging the sump pit if installing a submersible sump pump. Carefully check to see where water/sewer lines and other utility lines are located. Be sure not to split any of these wires when digging to avoid a big mess and having to call the utility company. Use the level to determine the basest level in the basement since that is where the pump should be located. Be certain to place dig the pit close to an outside window preferably near an electrical outlet. Find a good place to allow the pipe leading out of the pump, so it will drain to the outside of the home. Put the liner on the ground where you will be digging the sump pit. Trace around the liner.

Take the jackhammer and begin hammering through the cement in the shape of the outline of the liner. Dig the hole to be about 2 feet below ground level. Use a level to make sure the hole is completely level. Place the liner in the hole and use concrete and trowel to seal it off. Use about 1 1/4" of PVC pipe for the outtake pipe and install into the sump pump. Drill a hole in the rim joist for the pipe. Slice a piece of PVC pipe and place through the hole. About a half foot of pipe needs to run outdoors from the home and 3 to 4 inches needs to be inside the home. Make sure the pipe lengths are correct then cement in place. Caulk around the edges of the discharge pipe and connect a pipe to shoot the water approximately 6 feet from the foundation. A diverter will help aim the water away from the home. The float device needs to be tweaked, plug the pump in, and pour in up to 10 gallons of water to test the pump.

For more information on sump pumps head over to http://www.sumppumphelp.com/ where you can also find out about buying and maintaining sump pumps

Article Source: http://EzineArticles.com/?expert=Lucy_Dorilas

Friday, May 9, 2008

How to Build a Shed - Tips to Help You get Started by Philip H

Want to know how to build a shed? This article will give you a few tips and ideas to help you get started. There are many things to consider when you decide to build a shed yourself. Hopefully these tips will give you ideas on how to do it.

First of all, before you decide to learn how to build a shed, you want to consider how much money you are willing to spend. There are dozens of styles of sheds available, from very basic to much more costly. Here are a few topics you might want to think about:

1. Do you want a concrete foundation? Make sure your site is level, and that there will be sufficient drainage.

2. Will you have indoor water and electricity? In this case, their will be electrical and plumbing costs, unless you know how to do it yourself.

3. Are you going to include windows, insulation, special flooring or carpet, etc?

4. Do you want window shudders, a shingled roof or gables, anything extra?

5. Some sheds are made especially for pools, including changing rooms, a snack area, room for outdoor furniture storage, etc. Is this in your plan?

These are just a few of the questions you will want to know before you learn how to build a shed. Make sure that you gather all the details and write a list of the things you want to include in your shed. Making a plan before you start can save you many headaches, as well as alot of money.

Building your own shed is quite easy, as long as you know the costs and materials required before you start. You can purchase your own materials and build from a plan, or buy a kit that is easily put together. Whichever method you choose, I hope these tips have helped you learn a little about how to build a shed.


About the Author

If you would like to learn more about building your own shed, Philip invites you to find out more about how to build a shed at The How to Build Blog.

Should you hire contractor or do it yourself? by HandyPro

Americans are busier than ever, and that often means they are too busy to handle the simple home improvement projects a house requires from time to time. But before you go out and hire a general contractor to repair a hole in some drywall or paint a room, you should consider an alternative …#34; a local handyman or handyman service. With the boom in home remodeling, it’s often difficult to find a contractor who has time to do small projects. And often a contractor’s fees to handle small projects can be prohibitive for most homeowners.

A handyman makes a living from small home remodeling projects and often is a better alternative. Knowing exactly what your home project entails can help you make the proper decision when choosing, said Keith Paul, president of HandyPro Services.

“There are a few good rules of thumb people can use to determine which way to go and what to expect once they decide to hire a handyman,” Paul said. “If they do a little homework, they can save themselves both time and money.” Paul offers the following suggestions:

1.) Determine the scope of the project. You’ve probably heard that a handyman makes his living from small jobs. But what is considered a small job? “A handyman service considers a small job something around a home that can be completed in one to three days,” Paul said. “If the job is going to take more than a week to complete, the homeowner should probably consider hiring a contractor.” If you’re going to reside or re-roof your home , you probably need to find a reliable contractor who specializes in those areas of home remodeling. But if you just need to put in a new sink or faucet, or want to install a ceiling fan or a new mirror in the bath, most handyman services are fully capable of handling that kind of small job.

2.) How much does a handyman charge? Like any contractor, a handyman should provide you with a free no obligation estimate before tackling your home improvement project. A homeowner should never hire a handyman until knowing the cost of the project, including parts.

3.) How to find a quality handyman. Finding a handyman is much easier today because they usually advertise in your local Yellow pages or through coupon direct mailings. But once you find one or two names, you still need to do your homework before hiring one. You should first ask for references and call other homeowners, who have used the service to make sure they do quality work, and stand behind their guarantees. You should also check with the local Better Business Bureau, to determine if there are any complaints against the handyman. Once you have determined they are reputable, make sure they are licensed by the state of Minnesota, and are insured. If they aren’t, do not use them because you could be liable to pay for anything damaged or injuries while the handyman is working in your home. 4. Make a list of all the small projects you need done. When you finally decide on a particular handyman or service, you should have a list of all the projects you need done around the house. “We often tell homeowners we can handle their to-do list, Paul said. “Once the handyman is on site. moving from one small project to another is cheaper than having them come back two or three different times.” www.handypro.com Minneapolis, Minnesota

Phone: (612)823-8128 Fax (612)823-8121


About the Author

HandyPro Handyman Services, Inc. Minneapolis, Minnesota

Phone: (612)823-8128 Fax (612)823-8121

Wednesday, May 7, 2008

DIY Lawn Care Tips

Guide to DIY Lawn Care

Many people think that lawn care can only be handle properly by the professional service providers, maybe you are one of them. Let's say that you can handled your garden and lawn like a professional if you are aware of some basic factors.

DIY lawn care is easy as long as you are willing to invest some time in researching and learning those basic steps on lawn caring.

DIY Lawn Care Tips First tip: mowing. Be sure that you mow your lawn regularly, and also leave the lawn clippings on your lawn after mowing, notice that clippings provides a high source of slow-release nitrogen totally natural and chemicals free, other recommendations on mowing is to do it when grass is dry and never mow too short. thus grass may deplete the nutrients of soil when is mowed more than necessary.

Watering

Watering play the main roll in maintenance of your lawn. and watering must be according to the soil type, the grass type and the needs of certain season or climates. The best advice on catering your lawn is never water after rainfall. Keep a good drainage on your lawn and this will avoid pests and fungi, in addition make sure to distribute the water across the lawn evenly, remember excessive watering is as bad as lack of water.

Fertilizing

Crucial point of keeping your lawn healthy and beautiful, your first step is to analyze soil. Learn what type is and adjust the fertilizer to your soil needs, maybe it is advisable to use organic or natural fertilizer. Over fertilizing can be harmful to your grass and make so called fertilizer burn for that reason compost is the best available fertilizer for organic lawn care . It add organic matter and nutrients without damaging the environment and your health.

Aeration

Vital for your grass good health is the proper aearation: compact soil may deprive grass for the feeding that needs, preventing water and nutrients come to the roots and the result: poor and weak grass, so if you decide aerate your lawn, do it when you notice it is particularly hard, compact and thatch is accumulating too much.

Good raking in fall will prevent grass to cover with dead leave and organic material that pollute the soil and aid to development of grass illness and insects, notice that many pests come from the lack of good maintenance, specially mold, they find a favorable climate to grow in a uncleaned area. Clean, free of weed, dead leave and other organic material is vital to prevent insect infestation or other incidents that can be very harmful to your lawn.

About Tools For DIY Lawn Care

Basic about tools and their proper maintenance will facilitate your work, your tools must be clean, free of rust or dirt, sharp and keep on a dry place, they are important to lawn caring and if you don't take the adequate measure they can ruin the whole work. Use the right tools for you, take your time search what kind your need according to your lawn size and conditions, you can start from basic tools like rake, spades and shear and reach to the most sophisticated lawnmower. Taking the above rules in mind, you can keep your lawn as a professional may do, without consuming too much time and money, maybe with the help of used landscaping equipment, and you will proud of showing your work to friends and relatives

Sunday, May 4, 2008

Did It Myself! Deck On Slope

Before

Before Photo

After

After Photo


Project Summary
The postage stamp deck (12 x 12) that came with this house wouldn't fit our patio table for a family of five, much less our grill. The slope next to the deck was just a bad mow...simply useless area. It called...screamed, for an extension of the existing deck.

Follow-Up: DIY Home Improvement

Source http://k0ny.com/?p=63

Owning the house is turning out to be a LOT of work. My excitement to build my own furniture has been put on hold while necessary repairs and renovations get done. On my “to do list” are a number of items which take priority.

Among them are:
• Installing a new pedestal sink
• Covering up a hole in the roof where birds are trying to nest
• Sealing a small leak above the bay window
• Patching and leveling the floors enough to lay laminate wood flooring above them
• Replacing tiles in the 1st floor bathroom
• Fixing the light above the shower on the 3rd floor
• Installing a new kitchen sink
• Getting the plumbing in the bonus apartment fixed
• Re-repairing the front porch railing
• Putting the doors back in a room we’ve painted
• Moving furniture out of the way to allow painters access to our walls
• Fixing the lawn in both the front and back yards

All that is extra work on top of the full time job and raising a child (both of which are at the top of my priorities list). I don’t mind the work. I even enjoy things like driving screws into floors or walls, trimming grass with a weed whacker or shaping wood with various power tools.

There are however, a number of things that I don’t like. The uncertainty of inexperience is a major one. I worry that what I’m about to do in my home will turn out badly, wasting time and money and generally mucking up the biggest purchase of my life. I don’t like the feeling of potential failure on such a large scale. It makes me gun-shy when starting some of the larger projects. The thought of disappointing my family by doing something wrong weighs pretty heavily on my mind.

Another thing that I don’t like is the whole “typical guy” stereotype. Going to a home improvement center to purchase tools and materials is a necessity of doing repairs and improvements on your home. It isn’t some secret club where guys get to live out their wildest manly fantasies. For me, the closest Home Depot or Lowes is a significant drive away. I don’t like being treated like I’m going for a pleasure cruise when I need to drive to one of these places, find the proper tools and materials, and then lug them all home. This is not my idea of “fun” and it would be really nice if my friends and family stopped acting like I was sneaking off for “me” time when I’m doing all this stuff to make our home better.

My final gripe about “do-it-yourself” projects is the abundance of surprises. The plans I posted here in my last blog for a bed and desk are a great example. When I hit the local Home Depot to pick up the standard lumber pieces I needed, I discovered with great surprise that a board known as a 2×4 or a 1×6 don’t actually measure 2 inches by 4 inches or 1 inch by 6 inches respectively. They are named this way prior to being planed smooth at a lumber mill. After excess wood is shaved off, their dimensions are not only different, but also not guaranteed to be the same from board to board. So my fall back plan is to purchase furniture initially from a “Ikea” type shop then work up to building my own over time from raw lumber which I would plane myself to the right dimensions. This is just one example of surprises though.

After purchasing a ton of laminate planks to redo our floors, I was surprised to discover a very uneven floor which first needed to be repaired. When assembling the pedestal sink for our bathroom, I discovered that the waste pipe was just a bit too short to work. These surprises, both big and small, bring work to a stop, delaying my plans for moving in. Sometimes I’m lacking the right tool to deal with an issue, other times I don’t have the proper materials. My choice then becomes to pay much more for the items at a local hardware shop or drive 15 miles to a home improvement center.

At this point, our new home is in complete disarray, but it continues to improve every few days as I find the time to spend on it. Last week I ripped out carpeting. This week, I’ll be patching floors and hopefully starting the laminate installs. Some pictures of the work in progress can be found below as well as a video tour:

click on image for larger view

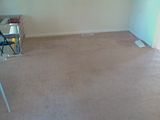
The house came with a decent carpetting, but of course we wanted to get rid of it and make the place our own.

click on image for larger viewclick on image for larger viewclick on image for larger viewclick on image for larger view

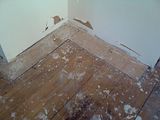
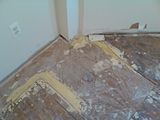
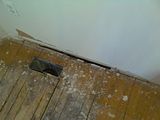
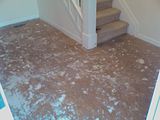
So I ripped up the carpet and found this nightmare below it. Not only are the boards full of cracks and gaps, but the floor is completely uneven, by over an inch and a half.

click on image for larger view click on image for larger view

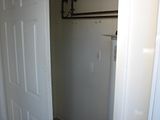
There was the 50 gallon water heater that was illegally ducted through the side of the house when we bought the place. It was taking up half a closet in the kitchen, next to the back door.

click on image for larger view click on image for larger viewclick on image for larger view

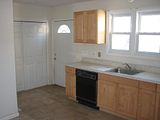
We removed it and replaced it with a wall-mounted tankless water heater which is properly vented through the roof. More of the closet can now be used for pantry storage. While the other half of it, has been converted into a proper entry way to the first floor bathroom. Now our dining room is no longer connected to a toilet.


This is a tour of the place by my son. Enjoy.

This is my second, in a series of blogs I intend to post on the subject of home improvement and “Do-It-Yourself Home Improvements” Please let me know your thoughts and how you’re doing on those DIY project you’ve undertaken, in the comments section below.

Top 10 DIY Home Projects

Your home is your castle, and what better way to outfit the palace than with some do-it-yourself ingenuity. We've featured dozens of DIY projects over the years, and today it's time to shine the spotlight on the most clever, useful, and fun. You've already seen our top 10 DIY office projects, so today it's time to check out some of the best creations modders, repurposers, and makers have rigged up at home.

10. Mailing Tube Wine Rack

wine-rack.png When you want to spend your cash on good vino instead of the rack that will hold it, just stack up a set of mailing tubes and go. This project is dead simple, and stowed away under a shelf (as pictured), and optionally painted a color of your choice, it looks good, too. (original post)

diylamp2_sm.jpg

9. CD Stack Lamp

What better way to put that dusty stack of free AOL CDs to good use than to turn it into a mod lamp? This project requires some elbow grease and the result is probably best fit for a family room, basement, or game room. (original post)

8. Wall-mounted Magnetic Knife Block

Instead of letting that big ol' knife block take up kitchen counter space, make one to mount on the wall. Take a block of wood, carve out slots in the back and glue in some strong magnets. Then, mount your creation to the wall to keep your knives accessible and out of the way. Hit the video to see this sucker in action; it's stickier than you think. (original post)

7. Auto-on Watch Holder Pantry Light

diy-pantry-light_sm.jpgStop fumbling around in that darkened cupboard or closet—rig up an instant on fridge-like lighting system with a plastic wristwatch holder and some ingenuity. Connect a reverse switch to rope lights inside the door and mount the switch inside a Timex watch holder. When the door closes, the switch opens and the light goes off. When you open the door? The lights snap on automatically. Here's my Flickr photo set of this in action (with a diagram!).


6. Hands-free Toilet Flusher


Keep your hands off the toilet handle with this foot pedal flusher, rigged up using paper towel rolls, shoe polish, and a wire hanger. This one would probably work best in a frat house. (original post)

5. Wall Outlet Safe

Stow your small valuables where no thief would think to look—inside what looks like a wall outlet. Hit the video to see how it's done and how it works (original post). For more secret hiding places, see also the secret hollow book.

4. Secret Bookshelf Door

Every kid's dream is to discover a secret door magically open when you pull a book off the shelf, and dedicated DIYer Simon Shea made that dream come true. This is a really cool project, but it obviously takes quite a bit of commitment. (original post)

3. Automated Garden Watering Drip System

Never worry about forgetting to water your lawn or garden again. Green thumb and DIYer Matt Haughey describes how to build your very own automated drip system to keep the plants hydrated even when you're on vacation. (See more of Matt's backyard adventures in his feature on how to build your own deck.)


2. Homebrew $30 Air Conditioner


diyac.jpg When the heat gets to be too much and central air isn't an option, build yourself a DIY AC for thirty bucks. Put together by college students suffering through summer school in an air conditioner-less dorm, this project ain't pretty, but it sure is nifty. Instead of wasting water by letting it run off the contraption, here's a closed circuit version. (original post)

1. Remote Control Deadbolt

Unlock your garage or toolshed's deadbolt via remote control, as shown in the video above. This project doesn't rate high on the easy scale, but definitely gets points for clever AND useful. (original post)


What are your favorite DIY home projects? What did we miss? What have you rigged up at home? Let us know in the comments. For more do-it-yourselfness, check out our top 10 DIY office projects.

Saturday, May 3, 2008

What You Need In Your Toolbox

What do you need in your toolbox? The answer really depends on what you need to use your tools for - are you a weekend DIY enthusiast, or do you use your tools for your job? However, there are a few basics that everyone should have in their toolbox that will come in handy in many everyday DIY situations.

Toolbox Essentials

- The toolbox. OK, sounds obvious, but it pays to invest in a dedicated toolbox with places for all of your tools. You'll appreciate the organization when you need to put your hands on something fast.

- A home repair guide. If you're not very handy around the house, this book will help guide you through the steps to complete simple home repair projects. Cheaper than just guessing and cheaper than calling in the pros.

- A Hammer - Another easy one that surely has occurred to everyone. There are all sorts of fancy hammer models in the stores, but there is no need to make things complicated. A claw hammer with a head for hammering in those nails and a claw for pulling them out when you discover you have put them in the wrong place should work out just fine.

- Screwdrivers - Screwdrivers are where things start getting a little more tricky for the home repair novice. There are many different kinds of screwdrivers and a well stocked toolbox needs to have a few. A slotted head, Phillips head, and crosspoint head should be adequate to meet most basic needs.

- Pliers - Pliers are for grabbing, pure and simple. But there are lots of different kinds of grabbing to be done, and you'll need different pliers for each of these jobs. For instance, cutting pliers pinch hard enough to cut through whatever you are grabbing. Gripping pliers do exactly when the name implied (look for flat nose, round nose, and needle nose). These kinds of pliers should be plenty for a starter tool kit - leave the crimping electrical pliers to the pros.

- Tape Measure - Comes in handy for lots of different reasons - measuring the size of the hole in your wall, measuring furniture, measuring where you're going to put the picture on the wall - the list goes on and on.

- Putty Knife - Putty knifes help spread all of the gobbly-gook that comes along with home improvement projects. They're easier and more suitable than ruining a kitchen knife.

- Wrenches - Last but not least, stock up on wrenches. The open end wrench is the most common and the most useful - it will fit most bolts if you stock up on these wrenches in a few different sizes. If you want to impress your friends, toss in a crescent wrench as well.

Article Source: http://www.ApprovedArticles.com


Categories

Home Improvement Blogs - Blog Catalog Blog Directory