Making your own pattern allows you to get your slipcover’s curves,
contours, width, and length just right. Muslin is a terrific fabric for
slipcover planning:
Buy more muslin than you think you’ll need, even as much as one-third more.
- Take off the chair’s cushion.
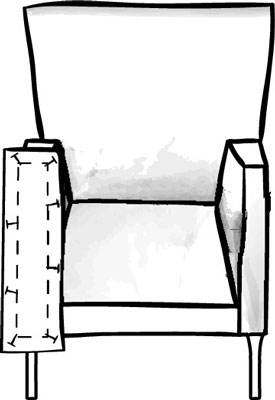
- Starting with the outside back of your chair, measure the width and length.If you want the slipcover to go all the way to the floor, measure to the floor.
- Add 4 inches to your width and length measurements and cut your muslin piece.This extra amount allows adequate muslin to create your seam allowance.
- Pin it to the back of the chair with straight pins.
- With tailor’s chalk, carefully follow the seams that are already on your armchair, tracing lines with your chalk right on your pinned muslin.
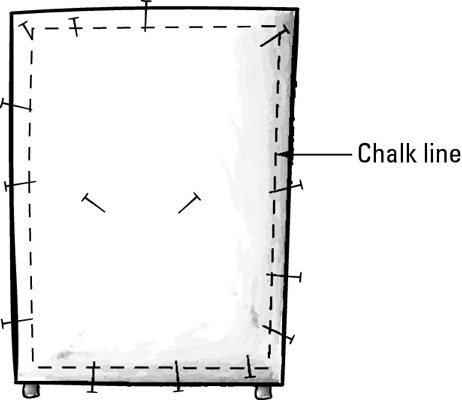 Make sure your lines are straight; use your ruler or L-square if that helps you.
 - Remove the muslin and using your fabric marker and ruler, draw another line a 1/2-inch to the right from the chalk line that you traced in Step 5.
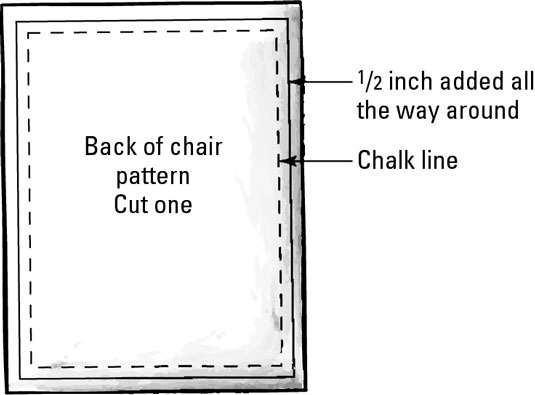 This mark is the cutting line and reflects your 1/2-inch seam allowance.
 - With your scissors, cut the muslin piece out using the second line you drew in Step 6.With your fabric marker, write on the back: “Back, Cut 1.”
- Measure your chair’s side.
 Follow the same instructions in Steps 1 through 7. Add 4 inches to each measurement, measure and pin the muslin to the chair, chalk around the seams to get the shape, add your 1/2-inch seam allowance in fabric marker, and cut out your piece. This piece is your side pattern; mark it “Side, Cut 2, reversing one.” To get a mirrored pair of sidepieces, you must flip the pattern over when you cut the second piece unless your pattern piece is truly rectilinear.
 - For the inside seat area, measure from the bottom of the seatback up and over the top of the chair, to the back area (where you made your first pattern), and be sure to add 4 inches to each measurement.

- Chalk a line on the top where the fabric bends to meet the chair back pattern.Pin, chalk, remove your muslin, add a 1/2-inch seam allowance line around your chalk marks using your fabric marker, label it “Seatback, Cut 1,” and cut out your pattern.
- For the inside armrest area, you have to go over the top to meet your side pattern, and make sure to chalk a line at the bend.
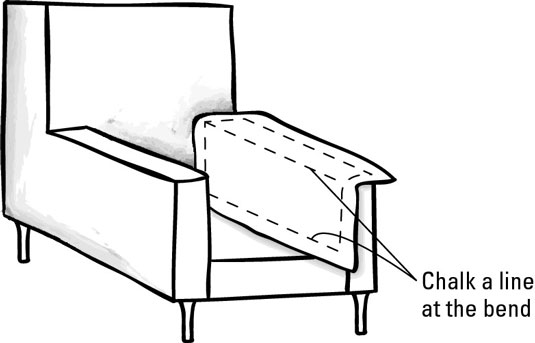 Pin, chalk, remove, add your 1/2-inch seam allowance line, cut out your pattern, and label it “Inside arm rest, Cut 2, reversing one.”
 - Create your seat pattern.
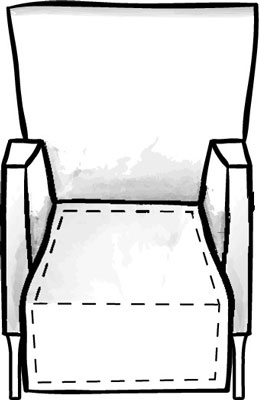 Start at the crease where the seat meets the seatback and go down to the floor in front of the chair. Repeat the steps as previously to create your muslin pattern and label it “Seat, Cut 1.”
 - Create a pattern for the front of the armrests.
 Repeat all the previous steps to create your muslin pattern, and label it “Front armrest, Cut 2, reversing one.”
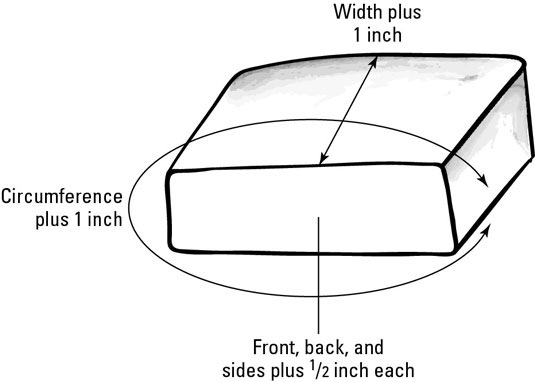
 - You also need to cover your seat cushion.This cushion cover looks like a tube, and it’s easy to make. To make the first pattern:
- Measure the cushion’s width and the circumference and add a 1/2-inch to each measurement. Create your pattern in muslin and label it “Cushion top, Cut 1.”
- Measure the cushion’s front and back. If your cushion is square, these measurements are equal. Add a 1/2-inch to each measurement. Create your pattern and label it “Cushion sides, Cut 2.”
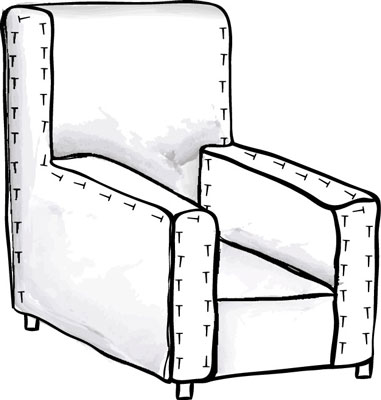
- Pin the muslin pieces together working right on the armchair.A 1/2-inch in from the cut edge of the muslin fabric is where the pieces need to join. Use straight pins, or safety pins, the latter for more hold.
- After you pin your muslin, remove the muslin and, using a baste stitch, start sewing your pieces together, making sure to check the “slipcover” as you sew every few seams to make sure the fit is correct.
- Hem the bottom.
- For your cushion, sew the two ends of the long piece of muslin into a tube.

- Starting at the corner, pin in one rectangular piece of muslin into the open area, or the tube’s “mouth,” and stitch it in using a 1/2-inch seam allowance.Stitch only one long seam on the other side so you can insert your cushion to check for the fit. (source)


No comments:
Post a Comment