Translate

Wednesday, January 13, 2016

Household Uses of Hydrogen Peroxide

All the household uses of hydrogen peroxide start to sound alike after a while.....

How to clean anything with hydrogen peroxide!(source)

I've written a lot about individual uses of hydrogen peroxide, and NOW I'm ready to write this super-hyper-fancy-silly-general-everything page, where I will cover the entire scope of cleaning - disinfecting - sanitizing - deodorizing - bleaching everything under the sun.
Really, this is kind of a joke -- because there are specifics things to know about using peroxide for some particular things...... And yet, there really are only so many ways to do things.
The bottom line? When in doubt, SOAK IT IN PEROXIDE!
CAUTION!
  • Living things are very sensitive! Too strong a solution of peroxide can do real harm to: people, plants, animals, skin, fur, fruit, vegetables, and sprouting seeds. Please find out the appropriate level of dilution to use when dealing with people, animals, and plants.
  • Use caution in bleaching -- you don't want uneven results. Bleaching hair and teeth often uses higher strength hydrogen peroxide, which you should not get on your skin or gums. Bleaching is usually done by professionals.
  • Use caution with metal things. Contact with hydrogen peroxide will tend to make metal rust faster.

All set? Here we go! Ready for take off.....

How to use hydrogen peroxide to clean - disinfect - bleach - sanitize - deodorize (almost) anything:

  1. Spray hydrogen peroxide on it, and wipe off (counter tops, mirrors, windows, hands, animal's fur, moldy lawn chairs, moldy basement walls)
  2. Spray hydrogen peroxide on it, and leave it on (wash off later, or scrub off) (shower walls, tiles, catbox, moldy plant leaves)
  3. Mix peroxide with hot water and soap and apply (mop the floor, in a carpet cleaning machine)
  4. Pour some peroxide in the bottom, spray the sides, and let it sit (garbage cans, catbox, empty aquarium, empty hamster cage)
  5. Soak it in hydrogen peroxide (yellowed plastic, infected finger, earrings, fruit, vegetables, seeds you want to sprout)
  6. If soaking it didn't help, soak it again.....
Monday, January 11, 2016

Make Your Own Moroccan Spiced Soap

Post image for Make Your Own Moroccan Spiced Soap 

Are you wondering what to get for those friends and family still in need of a gift? These cute little soaps make the perfect present for anyone on that list.  The aroma of exquisite spices are reminiscent of Morocco — exotic, intriguing, and warm. Not only do these ingredients have a marvelous smell, they hold countless healing and health attributes. Cardamom promotes respiratory health, anise works as an antiseptic to promote healing and prevent infection, cloves can increase blood flow while stimulating and rejuvenating tired skin, while allspice soothes sore muscles and is also often used as a remedy for arthritis. Whip some up for your loved ones, but don’t forget to keep a few for yourself.

IMG_7938
Materials:
Soap base: you can either use a pre-made bar of store-bought soap, a craft store soap base, or any basic soap recipe. I used two bars of pre-made organic vitamin E oil soap from Whole Foods.
Ground cardamom
Anise, full or ground. I used full seeds to act as an exfolient in the soaps.
Ground cloves
Ground allspice
Ground cinnamon
Full bay leaves, placed in the bottom of your soap mold
Optional Extras:
*To make moisturizing soap: add in a tbsp of coconut oil or vitamin E oil.
*For calming soap, add in fresh mint leaves which yield an additional lovely scent.
*To make your skin softer, add in 1 tbsp of honey.
Cut your soap base into small bits so they easily melt. With a double broiler, melt your soap in a ceramic or glass bowl, stirring constantly. If the consistency becomes too thick, add a tbsp of coconut oil to the mixture.

Friday, January 8, 2016

Easy Homemade Oven Cleaner

oven-before-after
Today’s post is sponsored by the word: PROCRASTINATION. :-)  It’s a very fitting word for this particular subject matter…because I think if there were a competition for who could procrastinate a particularly onerous chore like cleaning the oven the longest….I would definitely be on top of the winners’ platform showing off my GOLD medal! But wait, it gets WORSE! Before I even got to the procrastinating point….I spent a LONG time RATIONALIZING why I didn’t need to clean the oven in the first place.
“No one sees it besides me!”     “It’s not THAT bad!” (As it went from bad to WORSE!)      “No ones cares what the inside looks like….do they?”
Well, while they might not necessarily CARE….they do notice.  One Sunday a few months ago my daughter in college and her boyfriend came for Sunday dinner, and during the preparations she actually had the NERVE to point out that the oven was pretty dirty.  Unfortunately (fortunately?) that’s what it took to jar me out of my stupor of rationalization and catapult me into the realms of PROCRASTINATION. Which is where I have stayed for the last couple of months.

oven

DIY Crafts to Prepare Your Front Porch for Spring

by Bailey LeRoux
As winter winds to a close and spring prepares to bounce its way back into town, we start to spend a little more time thinking about the outdoors.  There is something so wonderfully Texan about a well-designed front porch, which is why we loved sharing tips in our magazine about how to maximize the space that welcomes people into your home. Now, for all the crafters out there, we’d like to go a step farther and share a little front porch crafting inspiration.

This wreath is for sale on Etsy, but we think if you get in touch with that old hot-glue gun, you could easily make your own version at home.
il_570xN.612732035_nl74

A nice oval frame around a floral initial? Perfect wreath alternative for the front door! Tutorial here:

Thursday, January 7, 2016

DIY Wooden Mirror

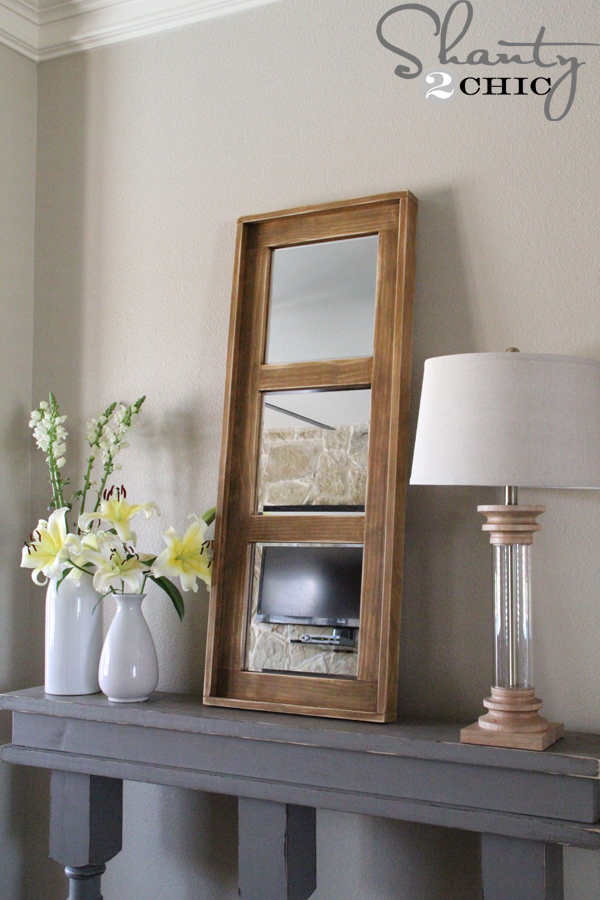
Hey guys!  I’m back to share the super cute Mirror that you may have seen hanging out on top of my DIY Console Table last week!
Wooden-Mirror-DIY
It stands just over 4 ft. tall making it great for so many spaces and guess what?  It only cost me about $30 to make and it’s SUPER Easy – a total beginner project!
Here’s how!
plywood-measurement
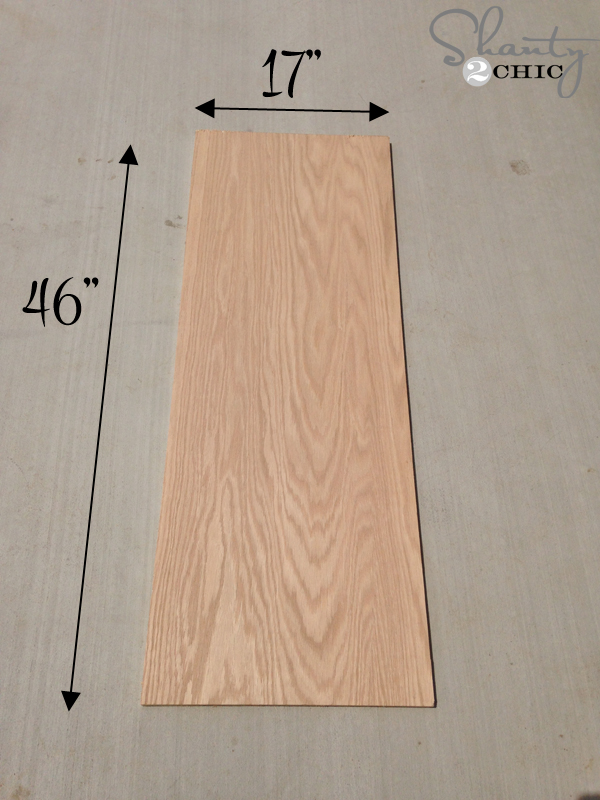
I started with a piece of scrap Purebond Plywood that I cut down to 46″x17″.
Rip-Cut
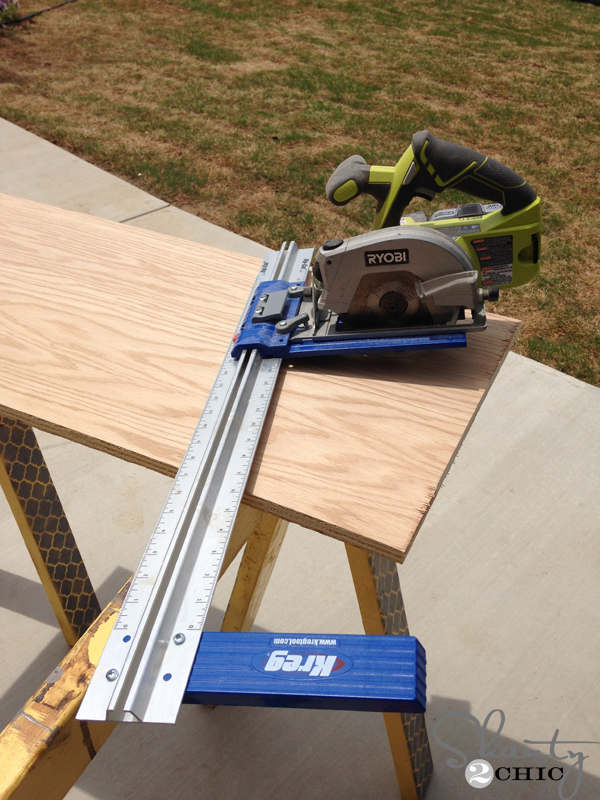
Because it was a scrap from another project, I used my Kreg Jig Rip Cut to cut the scrap down.  This is the perfect tool if you don’t have room for a table saw or if you aren’t ready for the purchase.  It just slides on to your circular saw and it’s only $31 on Amazon right now (prime) with free shipping. I’ve shared the link below!  If you don’t have a circular saw or scrap plywood, no worries!  Just purchase a 2’x4′ 3/4″ thick panel at your local hardware store.  They can even cut it down for you there
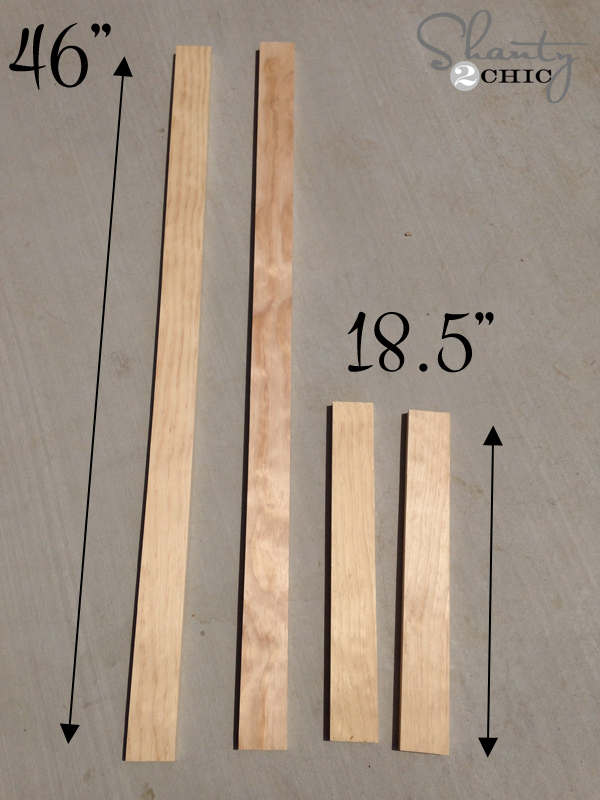
Next, I purchased 3 1x3x8 boards and cut 2 down to 41″, 2 at 17″ and 2 at 12″.
nail-top-and-bottom-boards
I used my Ryobi Airstrike Nailer to attach the 2 17″ boards to the top and bottom of the plywood panel. These are flush with the ends of the plywood.
add-boards
Then, I added the 2 41″ pieces to the sides of the plywood, also flush with the edges.  Next, I nailed on the final 12″ pieces.  I put the bottom one 14.5″ from the edge of the plywood and the top one, also 14.5″ from the edge.
trim-measurments

Monday, January 4, 2016

15 Surprising Uses for Toilet Paper Tubes


When you finish a roll of toilet paper or paper towels, do you toss the cardboard tube into the recycle bin? Check out these awesome ways to reuse them instead!
The average American family uses around 240 rolls of toilet paper per year – around 20 12-packs. That’s a lot of cardboard headed to the recycle bin or the landfill. Recycling your cardboard paper tubes is good, but reusing them is even better, since you get to skip the energy use and waste produced in a paper recycling plant.
I know, crafting with toilet paper tubes might seem a little bit gross. If that idea squicks you out, you can cut paper towel tubes down to use in these projects instead. For what it’s worth, I’ve been using toilet paper tubes in craft projects for years without any problems, but I totally understand if you’d rather avoid crafting with something that lived in your bathroom. It’s all about your comfort level!
We keep a little basket on a shelf in the bathroom to stash empty toilet paper rolls for crafting. Some of the toilet paper tube ideas below use a single roll and some involve a few rolls. Take a gander, and decide how many rolls you need to save up to start crafting!
15 Ways to Reuse Toilet Paper Tubes (or Paper Towel Tubes)
These play rockets all use toilet paper or paper towel tubes as the foundation.

15 Ways to Reuse Toilet Paper Tubes (or Paper Towel Tubes)

1. DIY Rocket – A toilet paper or paper towel tube is the perfect base for making an upcycled play rocket.
We made these awesome rockets at my crafty baby shower, and they were so fun to make, I thought I'd share how to make a rocket in case you want to make your own!

2. Play Megaphone – I can’t call this a craft, really, but it’s a game that my 17-month-old LOVES. Grab a toilet paper or paper towel tube for each of you, and talk into one of the open ends. He loves how it distorts our voices!
3. Faux Christmas Lights – Think LED lights are an eco-friendly Christmas decoration? Check out these totally upcycled lights made from toilet paper tubes!
DIY toilet paper Christmas lights

Sunday, January 3, 2016

DIY Slime Best Recipe Video!


image source 

This homemade slime only takes a few minutes to make but is sure to entertain your little ones for much longer


WhatsUpMoms

Saturday, January 2, 2016

How to Decorate Slippers^ Video Tutorials


Scrap fabric can be used to decorate slippers by tying a puffy bow or sewing it into a rosette. Adorn a plain pair of slippers using fabric remnants with tips from an accessory designer and former retail buyer in this free video on fashion crafts.


Decorating Flip Flops

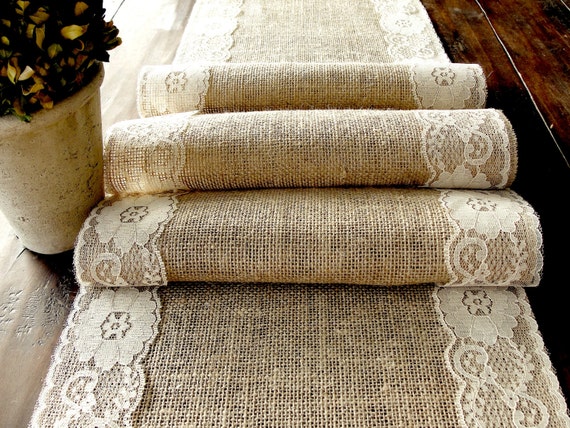
DIY No Sew Burlap Table Runners


This tutorial shows you step by step how to make your own DIY table runners using burlap and fusible webbing. You can get a neatly finished edge without having to sew a stitch! Other fabrics will also work with this technique, if you don't want to use burlap.


Categories

Home Improvement Blogs - Blog Catalog Blog Directory